
During the 2017 summer session at West Coast School, held at the University of San Diego, a small group of photographers and I enjoyed the rare privilege of studying Wedding Photography Lighting with Jesús Padilla Neri, a renowned wedding photographer from León, Mexico.
Jesús shared his systematic lighting techniques with us in a very straightforward manner; with lighting diagrams, behind the scenes videos and in class demonstrations. Then with the basics under our belts, we ventured out into the real world, exploring various picturesque locations within the beautiful USD campus grounds. We were then treated to exploring Jesús's Lighting Magic at Coronado Beach.
Jesús explained that in order to capture dramatic and consistently beautiful images at a wedding, required being able to move quickly. So, in order to accomplish this he developed a kind of cook book approach, with three high powered portable lights, managed by his trained assistants.
The Basic Setup:
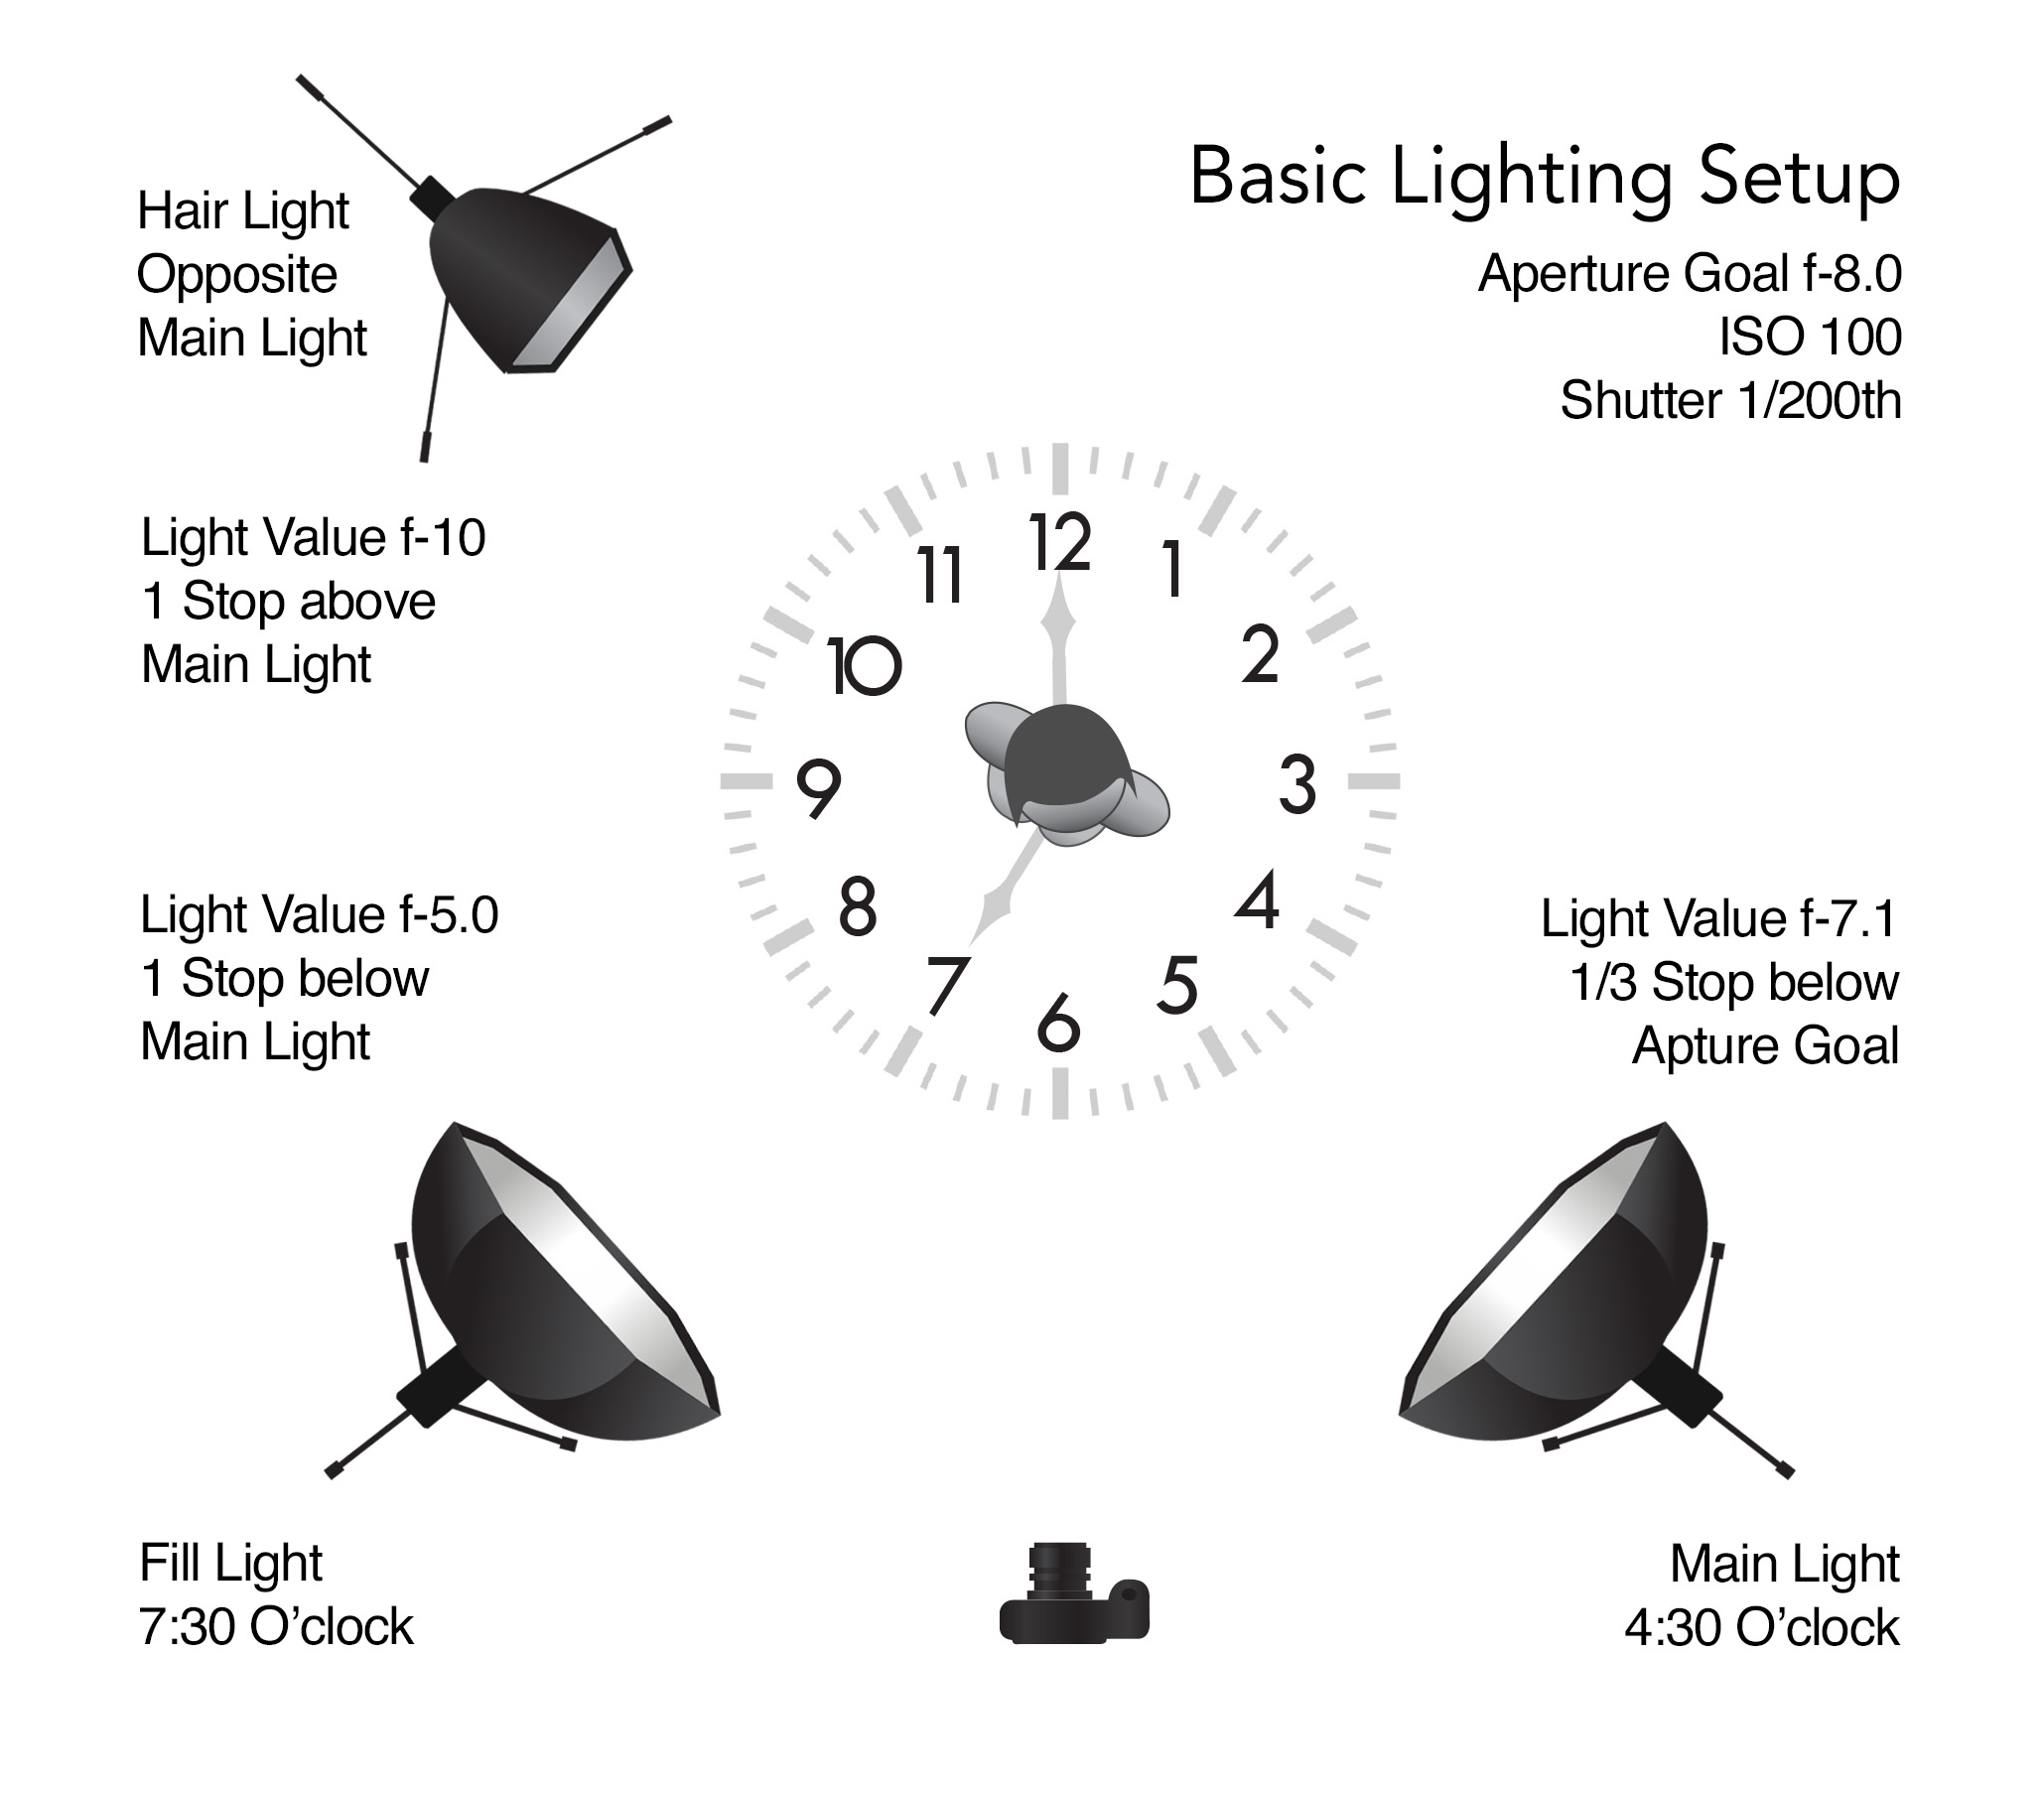
Formula One for Basic Lighting Setup
Step One is to determine by measurement the ambient light level. That is, what are the three components for a correct exposure of the background for the selected setting? ISO, shutter and aperture values. Begin with ISO = 100, shutter = 1/200.
Select the Aperture Goal, by measurement, to correctly expose the background.
Based on the composition for the scene, place the Main and Fill lights as close as possible to the subject, so as to not be visible in the selected frame composition.
Note: The Main and Fill lights should be equidistant from the subject.
Once the distance for the Main and Fill lights are defined, set the output power of the Main light to be 1/3 stop below the measured aperture goal. In this case, f-7.1. Note the power setting for the Main light.
Set the output power of the Fill light for one stop below that of the Main light. That is reduce the power setting by one stop. That is, if the Main light is set for 1/4 power, set the Fill light for 1/8 power. In this case, producing a light value of f-5.0.
Position the Back light directly opposite the Main light, such that it will also be out of frame. Set the output power for one stop above the Main light. In this case, f-10.
For the title photograph in this article, we went inside one of the beautiful chapels on the USD campus. With our model Kristina, Jesús wanted to include the beautiful stained glass window as a compositional element. At first the thought was to provide the lighting for our model with LED wand lights. Jesús measured the exposure value for the stained glass window. ISO = 100, shutter = 1/125 and aperture = f-4.0. This equates to an exposure value of EV-11. At these settings, the LED lights did not provide adequate light.
Plan B: Go to the Mattresses - Adding Flash to illuminate our model, Kristina.
Maintaining the correct exposure for the stained glass window, the Main light was positioned camera right and set to produce a light value of f-3.5, 1/3 stop below the goal aperture of f-4.0. A grid was added to the Main light to minimize the light spill.
A speed light was positioned opposite the Main light at a height to provide side lighting.
As seen in the lighting diagram below, a reflector was added perpendicular to our model to lift the shadows and a speed light with 1/4 CTO Gel was positioned behind our model to achieve a glow on the veil.

Keeping similar lighting goals, the setup was modified for the environment.